

Projectors Tests Reviews
NothingProjector écran ALR black series : test/review
Published on: 26-09-2023 / Modified: 13-11-2024
I have tested around thirty projectors over the last 2 years but not many screens. It's not that I didn't want to but to test screens you need space and I didn't have any but I decided to make some to be able to test the ALR NothingProjector screen in good conditions . I started doing my projector tests on a simple white wall, I then moved to a homemade ALR screen to end up with a more neutral white screen to be able to test all types of projectors. Today I have the opportunity to test an ALR (ambient light rejection) screen from NothingProjector.
Where to buy
You can purchase the ALR NothingProjector display from their official site or through their store on Aliexpress:
NothingProjector (official site)
Aliexpress
Screen + cabinet promo
If you want to combine the quality of a NothingProjector screen with integration into a beautiful dedicated cabinet, you have the possibility to opt for this product:
This cabinet will allow you to hide the screen and your projector when you are not using it.
I have a promo code to reduce the price by 13%: NPBF
To take advantage of it: RolaTV cabinet
An ALR screen?
For those who have never used a screen of this type, I will start this test with a little explanation. A projector projects light onto a surface and this surface will in principle return light depending on the initial angle of incidence. If you project the image from below, part of the light will be reflected on the ceiling and you will lose brightness for the image in addition to having a partially lit room due to the reflection of light.
ALR screens are designed to capture ambient light (ALR = Ambient Light Rejection) via a slat system to focus the captured light forward. This allows on the one hand to avoid reflections at the periphery but also to increase the quantity of light for the image. This therefore allows this type of screen to be used in partially lit rooms but without being able to compete with a television for use in daylight.
Using a gray material for the canvas also makes the black blacker and creates depth in the image. This also comes at the expense of a loss of brightness and possibly a change in colors; this test aims to measure this impact.
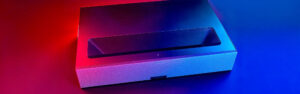
Unboxing
The NothingProjector Black Series display box is quite compact and contains absolutely everything you need to show off the display. The whole thing is carefully packaged to take up a minimum of space, the screen is perfectly protected in a fairly thick cardboard tube. The box contains the aluminum frame, the canvas and a box with all the accessories in sufficient quantity: springs, screwdrivers, protective gloves, dowels, wall bracket, screws, ...
Color accuracy
First there is the concept of colorimetric difference which is measured in delta E (abbreviation: dE). Delta E is a number that measures the difference between the color of a film and the color projected by the projector. Here you must obtain a delta E of 3 or less for the color to be considered faithful to the source. Not all projectors are equal in terms of color reliability and the same goes for a screen. There is a first loss of fidelity linked to the projector and a second linked to the screen.
To measure the differences, I measure the color at the output of the projector and then on the screen to assess the impact of the screen on the colors.
Brightness
The projector is a source of light and this light will interact with the surface of your screen. When we talk about brightness in lumens of a projector, we must imagine that this is the light power of a projector, so it does not change depending on the distance. The brightness on the screen, on the other hand, is measured in lux and this can vary depending on the projection distance and the nature of the screen. Brightness decreases with the square of the distance. If you move the projector 2 meters away, you will get 4 times less light.
To measure the difference in brightness, I measure the brightness in lux on a neutral surface placed on the screen and I then measure the brightness on the screen while keeping the same measurement position.
Assembly
Assembling a screen is not an insurmountable challenge, quite the contrary, but it requires a minimum of preparation. The first thing to do is to create space for editing because beyond the screen size, you will have to move around the screen without walking on it. I advise you to free up 1m to 1m50 around the screen to achieve this. The screen comes with a very easy to follow assembly manual, each part is labeled and you just have to follow the instructions. I assembled the screen without help in 2 hours, you can obviously save time by mounting the screen with someone.
The first step is to assemble the metal frame, it's a super simple step, you can't go wrong. Simply fit the frame, add the central bar and tighten everything. This step is simple and quite quick to perform.
The second step is done without the frame because you will have to prepare the canvas. You must therefore place the frame on its side and place the canvas on the ground on a very flat surface. The screen is protected by a light fabric but this can tear quite easily, so it must be handled with care. You must then insert the rods into the conduits on each side of the canvas. I thought the rods should fit together like they did on my previous display but that's not the case. There is always an A rod and a B rod and they fit next to each other in the conduit. It's not complicated either, you just have to make sure you combine the right stems.
The third step is to place the metal frame on the canvas. This should have the black side facing up and you should place the frame inside the black area to match the corners of the frame with white marks drawn on the black part of the screen. I didn't manage to put the frame in exactly the right place but that doesn't matter because the canvas will be stretched in the next step.
The fourth step consists of tensioning the canvas with the springs. This step is probably the longest of the entire process and this is where you will save time if you work in pairs. The springs must on the one hand be attached to the rod inserted in the second step and on the other hand be fixed in the frame. The springs have a small metal circle that allows them to be pulled with a wrench towards the frame. Ideally, you should follow the order indicated in the manual to ensure good canvas tension.
The last step is to place the plastic frame around the screen, this step is easy but I had some problems with the last piece to assemble, it didn't fit perfectly into the frame like the others so I used a spring to attach it and it worked great.
The NothingProjector screen is almost borderless, it truly gives the impression of having a floating image on the wall. If you don't plan to change screens regularly, you can use the wall brackets supplied with the projector. I haven't used these because I have a row of nails set at the correct height that give me the ability to interchange the screens based on my testing.
Like all screens of this type, it gives off a chemical odor, so ideally you should ventilate the room a little during assembly and for a few hours after assembly. The day after assembly, the smell was completely gone. In the next photo you can see this lined structure in the design of the screen, it is this which captures the light coming from below to reflect it towards the front of the projector.
The level of finish of the frame is good, there are some small gaps at the junctions but nothing really visible unless you are with your nose on the frame.
I had mounted the screen in daylight and after placing it, I tried it straight away to find that in daylight the image was much brighter than that of my white screen .
Day/night test
Many people write to me to ask me which projector to choose to be able to watch a film in a lit room and unfortunately I have to tell them the same thing, namely that a projector is not designed for that. Projectors are not capable of competing with a television in a room bathed in daylight. This does not mean that it is impossible but a priori, it always affects the image quality.
With an ALR screen, we can improve the situation because this type of screen will concentrate the light from the projector towards those who are in front of the screen, the loss of brightness is therefore less significant.
In the following video, you can see the impact of daylight on the image as well as the influence of the viewing angle. This type of screen offers more brightness on the front and less on the sides but I find that the brightness doesn't really drop when I look at the image from the sides.

On a white screen and under the same conditions, the image is absolutely unwatchable:
Brightness test
ALR screens are made up of thin slats that capture light and send it back to the front of the screen. You thus benefit from maximum light intake where a normal screen would reflect part of the light towards your ceiling or the sides depending on the projection angle. This also explains why the viewing angle of this type of screen is narrower because the light is channeled towards the front of the projector. If you position yourself a little to the side, you will theoretically observe a loss of brightness. This type of screen is therefore not ideal in a configuration where you have more than 3 people sitting next to each other because the people on the ends will receive less light. Well that's for theory, let's see in practice how this screen behaves.
Impact on angle
In the previous video, you could see that the viewing angle does not greatly degrade the brightness or image quality. This actually surprised me a little because with my first ALR screen, the drop in brightness at the periphery was brutal, this is not the case for this NothingProjector screen.
Here are some sample photos taken from the sides of the screen:
These photos were taken almost at 180° and the brightness does drop a little but not radically.
Brightness
The NothingProjector Black Series screen is announced with a gain (or rather a loss) of 0.6 which actually translates into a loss of brightness of 40%. I measured the brightness in the center with a completely white image by first measuring the brightness from a neutral surface and got 347 lux. I then measured the brightness from the NothingProjector screen and got 248 lux under the same conditions. I therefore have a gain of 0.71 instead of the 0.6 announced and my measurements are quite consistent with what I have seen from other testers.
A gain of 0.6 means that the image is darker overall because the goal is to lower the blacks to a lower level and thus create more depth in the image. Other colors are obviously also affected, so I'll measure the impact starting with black.
Impact on black
I measured a black at 0.02 cd/m² and it is by far the darkest black I have measured so far. Black is the great weakness of projectors because a projector is not capable of turning off certain pixels to simulate black, it will therefore project a dark gray. The last projector I tested before this screen emitted around 10 cd/m² before calibration and the black was really grayish. After calibration I was back down to around 5 cd/m², which is still significantly higher than the black measured for this screen.
For your information, 1 cd/m² corresponds to the light of a candle on a surface of 1 m².
Impact on light
This screen lowers the brightness of the image to obtain a deeper black but this also affects other colors. You can therefore only use this type of screen with bright projectors, otherwise the light areas of the image will be too dark. For this test, I used a Xiaomi Laser Cinema 2 and with this kind of projector, you will not have any brightness problems.
Reflections on the periphery
In the following image, I have projected a white image onto my white screen from the Xiaomi Laser Cinema 2 which sits at the base of the screen. Here we can clearly see the white reflected on the ceiling:
ALR screens are designed to capture ambient light and redirect it towards the center, so in principle they generate much less reflection in the projection room. I was using a white screen before testing this NothingProjector screen and when the image was bright, I noticed reflections throughout my room and I was no longer in total darkness. This has never really bothered me but the comparison with this screen is quite striking because I have almost no reflections and my room overall remains very dark which improves the experience quite pleasantly.
There is, however, one point to take into account and I receive a lot of comments on this subject. To be able to adapt the image to the size of the screen, you will have to play with the positioning of the projector but this will probably not be enough to be able to fit the image precisely into the frame of the screen. So you will need to use keystone correction to apply some adjustments. It should be understood that using a trapezoid does not change the projection area of the projector, it changes the size of the image within the projection area. This means that the projector will continue to send light outside the screen even if it no longer diffuses the image in this area. This will result in a slightly gray area around the screen. This is not a bug or a defect of the projector, unless you have an optical zoom, the projection cone does not change.
Contrast test
Contrast measures the difference between the light and dark areas of the screen and a projector capable of displaying very bright white and very deep black therefore has high contrast. ALR screens are not white, they are usually dark gray. For what? Firstly there is a question of material with metallic particles which reflect the light but a dark color makes it possible to darken the dark areas of the image and thus give more depth.
This solution is not a magic solution that will solve the contrast problem of a low contrast projector. An ALR screen will create more depth in the image by decreasing the intensity of black but it will also decrease the intensity of white. Concentrating the light will limit the impact of the loss on white but you will not double the contrast.
Colorimetry test
Screens are rarely color neutral, even white screens can cause color differences. You need to be aware of this because if you pay a few hundred euros for a good quality screen, you may not be able to take full advantage of it if you do not have the possibility of adapting the colorimetry of your projector.
This is also what calibration is for because even with a projector correctly calibrated at the factory, you will have to adapt it to your projection surface and its specificities. Calibration is not possible without a probe and the combination of each projector/screen can potentially be different. This is why for the same projector, you can obtain different measurements depending on the screen or the presence of light in the room.
To understand the impact on the colorimetry of this NothingProjector screen, I carried out several types of measurements:
- projector: I used the Xiaomi Laser Cinema 2 for all measurements
- image mode: I used cinema mode (preconfigured) and a configuration after calibration
- measurements: I took measurements at the output of the projector with the probe pointed towards the projector to avoid any form of pollution in the measurement, I then measured the colorimetry on the screen. The screens used are placed in 2 different locations, so I had to measure the colors at the projector output twice.
- screen: I used two screens to make the measurements to each time measure the differences between what comes out of the projector and the image projected on the screen
Measurements on the white screen
- measurements on projector / cinema mode (at the base of the white screen):
White dE 11.1
Red dE 12.9
Green dE 8.9
Blue dE 14
These values are far from ideal but that is not important at this stage. Like most lasers, white is strongly influenced by blue which is too dominant.
- measurement on white screen / cinema mode:
White dE 11
Red dE 12.8
Green dE 8
Blue dE 13.1
We see here that the white screen is not that neutral, the differences are not very important but they are very real. The blue is still dominant in the white making the image a little too cold.
Measurements on the ALR screen
- measurements on projector / cinema mode (at the base of the NothingProjector screen):
White dE 9.1
Red dE 9.6
Green dE 7.8
Blue dE 12.9
The basic measurements are different. For what? This clearly shows that the position of the projector plays a role in colorimetry. The projector here was placed in another location in my projection room where there is less light pollution from a blacked-out window.
- measurement on NothingProjector screen / cinema mode:
White dE 10.8
Red dE 9.3
Green dE 7.3
Blue dE 13.5
As you can see, the NothingProjector screen is not neutral, the blue is even more dominant. White was 111% blue without the screen and it rose to 116% with the screen. I also see the effect on cyan.
By calibrating the projector I managed to lower the blue to 104% of white to bring the dE of white down to around 5. If you don't have a probe, you won't be able to measure this difference but the blue is so dominant that lowering blue can only have positive effects on your image. Ideally, you should strengthen the red a little and slightly reduce the green.
Grayscale test
If I use the same ingredients as for the previous test (projector, screen, position, etc.), I can also measure the influence of the screen on the gray levels.
- measurements on projector / cinema mode (at the base of the white screen):
Gray dE 7.09 (max 19.69)
Gamma: 2.62
- measurement on white screen / cinema mode:
Gray dE 8.1 (max 21.78)
Gamma: 2.37
Here we see the influence of the white screen with gain quite clearly, all the grays become lighter and deviate from the norm.
- measurements on projector / cinema mode (at the base of the NothingProjector screen):
Gray dE 6.67 (max 13.03)
Gamma: 2.14
Again, here we see the influence of the place of the spotlight. The NothingProjector screen is placed in the back of the room at a greater distance from the obscured window and the results are better with exactly the same settings and the same projector.
- measurement on NothingProjector screen / cinema mode:
Gray dE 5.8 (max 12.20)
Gamma: 2.29
The NothingProjector screen improves gray levels in a natural way, especially if we compare it with the white screen which tends to deteriorate them. Even without the measurements the deterioration is visible to the naked eye but this white screen is not designed for UST projectors, so it is not very surprising.
- measurement on NothingProjector / calibrated screen:
Gray dE 1.92 (max 6.21)
Gamma: 2.17
After some adaptations, I obtain a good dE of 1.92 and a gamma of 2.17. I think that by spending a little more time I could probably do better but the purpose of this article is not to test the projector but rather the screen and its natural properties.
My opinion / conclusion
I had the opportunity to use several screens before testing this NothingProjector screen but I had never really done an in-depth test like this. So I took the opportunity to test my other screen to compare it to this one in order to illustrate the differences between a white screen and an ALR screen. I was not surprised by the result but it allowed me to quantify the differences with figures and avoid having an overly subjective judgment. The conclusion will therefore perhaps be a little technical but you should in principle be able to find your way around it.
Viewing angle: good
Visibility of metal particles: no
Hotspot: none
Color deviation: slight deviation, dominant blue
Grayscale deviation: improvement
Brightness gain/loss: 0.71
Contrast gain/loss: medium
Biveau of black: excellent
Assembly: easy
Chemical odor: limited
This ALR screen from NothingProjector therefore meets all expectations and even beyond. It will add real value to your USB projector by adding depth to the image and reducing the negative effect of ambient light. For practical reasons, I used a white screen for all my projectors but I realize that a screen of this type improves the image well beyond a neutral white screen.
The price positioning of this projector makes it very attractive because most equivalent screens from other brands are significantly more expensive and not necessarily of better quality.
 LAURENT WILLEN
Head of myself on this blog
I share my passions on my blog in my free time since 2006, I prefer that to watching nonsense on TV or on social networks. I work alone, I am undoubtedly one of the last survivors of the world of blogs and personal sites.
My speciality? Digital in all its forms. I have spent the last 25 years working for multinationals where I managed digital teams and generated revenues of over €500 million per year. I have expertise in telecoms, media, aviation, travel and tourism.


Questions/Comments